How To Manage Tax in Magento

31 January 2017
By limenotlemon
How To Manage Tax in Magento
Do you know? Magento offers an option that allows you to set up a complex taxation system for your product. You can set up customer tax classes and assign customer groups with a particular tax class, define product tax and assign them to your product, or set up the tax percentage based on the region and the country.
Not only that, you also able to set up compound taxes, fixed product taxes, and display consistent price across international borders. If for some reason you need to collect a value-added tax, then you can set your system to automatically calculate the appropriate amount of validation.
Every single product and customers in Magento could be assigned to a tax class. In turn, tax classes are used to define tax rules. Tax rules are a combination of product tax class, customer tax class, and tax rates. There are 3 types of basic tax classes :
- Product tax classes
- Shipping tax classes
- Customer tax classes
Product Tax Classes
You can create and assign product tax classes according to the tax requirement of each product. For example, you will not give any tax to your food products (or taxed but at a different rate. If you give an additional tax for shipping, then you must create a separate product tax class for shipping.
If you want to set product tax class, do the following :
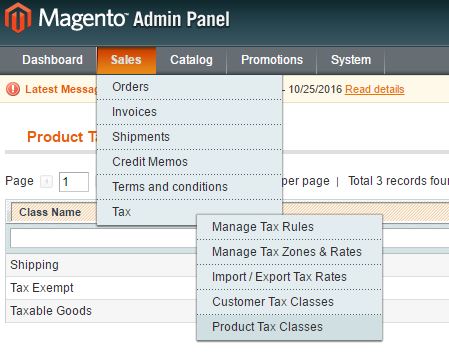
- Go to Sales -> Tax ->Product Tax Classes.
- Click the “Add New” button.
- Enter the tax name in the Class Name field.

- Click the “Save Class” button.
- Your new tax class will appear as an option for product prices customization now.
Shipping Tax Class
In Magento, you also able to set up a separate product class for shipping. In order to do that, you must configure the tax class that you want to use for shipping. To create a shipping tax class, do the following :
- First, create a new product tax class with the name “shipping”.
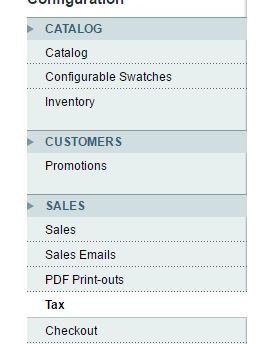
- After that, go to system -> Configuration.
- Select “Tax” in the left panel.
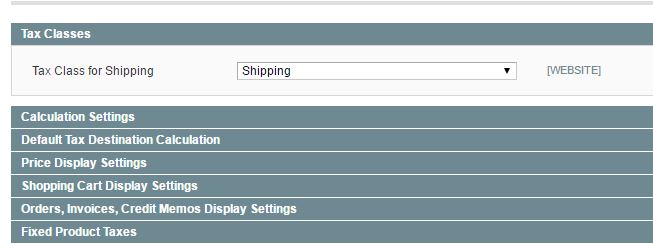
- Expand the “Tax Classes” section.
- Set up the “Tax Class for Shipping”.
- Click the “Save Config” button.
Customer Tax Classes
Magento allows you to define customer tax classes. Every customer in your online store can be divided into customer groups, and each customer group has their own customer tax class. You can use this customer tax class setting to set up a different tax rate between wholesale and retail customers. In order to set up customer tax class, do the following :
- Go to Sales -> Tax -> Customer Tax Classes.
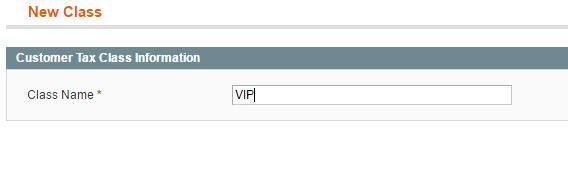
- Click the “Add New” button.
- Fill in a Class Name for your new customer tax class.
- When you finished, click the “Save Class” button.
In order to associate customer tax class with customer group, do the following :
- Go to Customers -> Customer Groups.
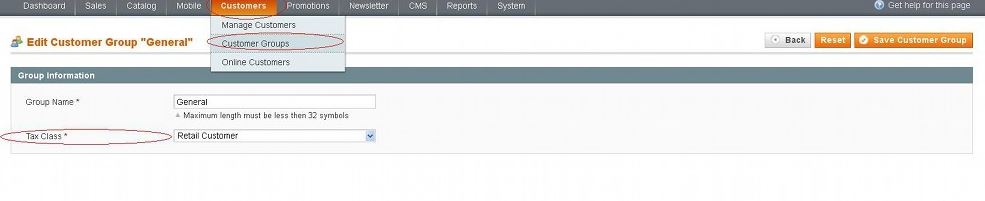
- Pick the name of the customer group that you want to edit.
- Select the tax you want to assign from the Tax Class drop-down menu.
- Click the “Save Customer Group” button.
Managing Tax Zones and Rates
Now you understand how to set up product and customer taxes. Next, we will learn how to manage tax zones and rates in Magento. In Magento, you can set the tax rate and geographical zone that associated with each zone. This zone could be as wide as a whole country or as small as a state, region or province within a country.
The tax zone and rate tool in Magento allow you to specify the tax rate for each geographical area so you can collect and remit taxes. You can set up a unique identifier for each tax zone and rate specification. That way, you are able to create multiple tax rates for a geographic area.
Store tax is calculated based on the store’s address. In order to manage tax zones and rates, do the following :
- Go to Sales -> Tax -> Manage Tax Zones & Rates.
- Click the “Add New Tax Rate” button.
- There are several fields which need to be filled in. They are :
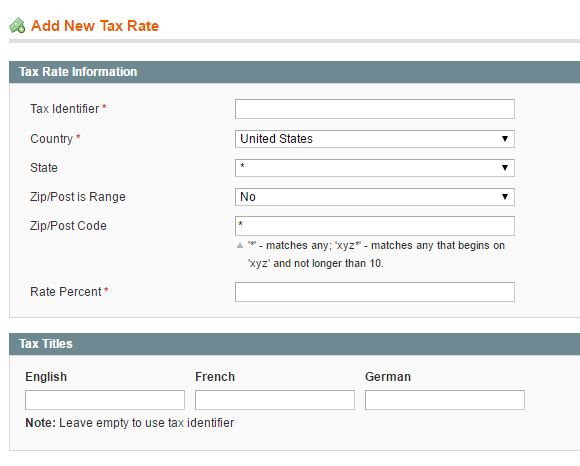
- Tax Identifier : You can specify the name of the tax in this field. Do not use any spaces for the name. If you want to separate words, just use hyphens or underscores. Any name you write here will be used for internal use only. However, if you do not specify the name for each store view (if you have more than one store view in your Magento), then the tax identifier will be the one that displayed to users. You can have as many tax rates per zones as you want. In that case, tax identifier can be used to distinguish between rates in one same zone or in different zones.
- Country : Select the country where you want to apply the tax rate.
- State : Select the state where you want to apply the tax rate from the available drop-down menu within the selected country. Magento has its own default preconfigured with the provinces or states of many of the countries.
- Zip/Post is Range : You can set this option to yes or no. It will be set to no by default.
- Zip/Post Code : You can enter the zip or post code here.
- Rate Percent : You can type the actual percent of the tax rate here. In the tax titles section, you can type the tax title for each store views. If you do not specify it, then the tax identifier will be used.
- When you finished, click the “Save Rate” button.
Managing Tax Rules
Tax rules can be used to combine customer tax classes, product tax classes and tax rates into one. If you do not set it up, no tax rules will be applied in your online store. With tax rules, you can set up a less or more complex taxation system. In order to manage tax rules, do the following :
- Go to Sales -> Tax -> Manage Tax Rules.
- You can see some of the tax rules examples, especially if you installed your Magento with data samples. You can either edit the available tax rule or add a new one. To add a new one, click the “Add New Tax Rule” button. You can see several options in the tax rule setting page.
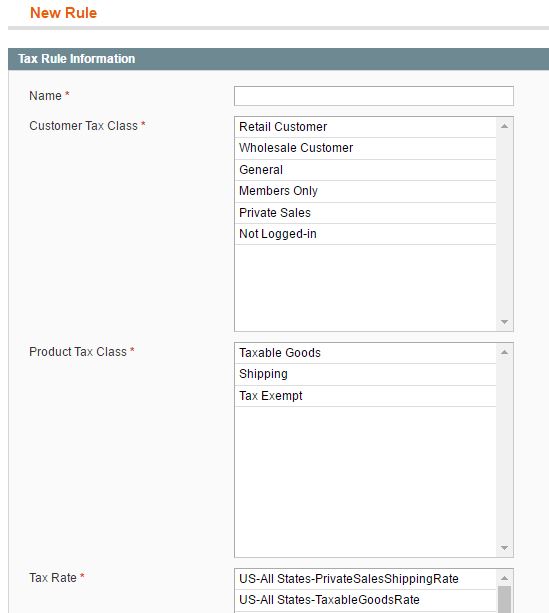
- Name : In this field, you can type in whatever name you want to apply for your tax rule.
- Customer Tax Class : You can pick all available customer tax class that you have created here before. You can choose as much as you want. The new tax rule will be applied if the customer belongs to the associated customer group. In order to pick more than one customer group, hold the Ctrl button on your keyboard and choose the customer group with your left mouse button.
- Product Tax Class : You can see all product tax classes you have created before here. Just like customer tax class, you can select more than one product tax class here.
- Tax Rate : This is a list of all the tax rates you have added before.
- Priority : This option allows you to be able to determine whether the tax should be applied in relation to other rules or not. For example, when you have two tax rules which match all the conditions, both will be used. Keep in mind that the one with a lower number will be applied first. This option is very useful if you want to use a quite complex tax system.
- Calculate off subtotal only : check this option if you want taxes to be based on the order subtotal.
- Sort Order : This option allows you to set the order in which the tax rules should be displayed.
- When finished, click the “Save Rule” button.
Those are some basic configuration for taxes in Magento. In order for your tax rules to work properly, make sure all conditions are fulfilled. If all conditions are matched, Magento will automatically calculate the tax based on all the available options.