How to Set Up Magento Layered Navigation

31 January 2017
By limenotlemon
Set Up Magento Layered Navigation
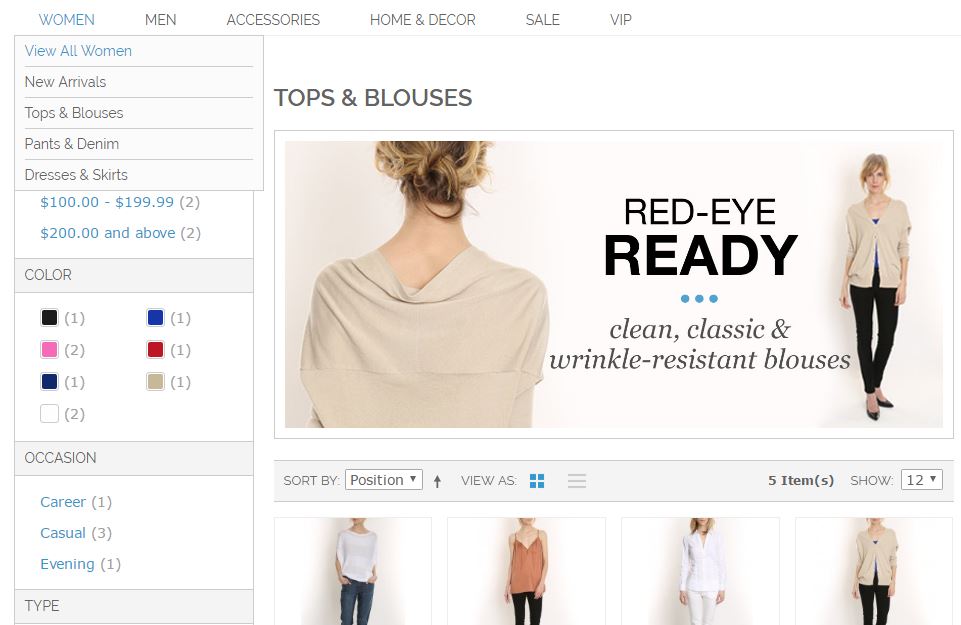
Layered navigation in Magento can help your customers to find products based on category, price range, or any other available attributes. Layered navigation usually can be seen in the left column of the search result and category pages. Sometimes it may appear on the home page too. The standard version of layered navigation includes a “Shop By” list of price range and categories. You are free to configure the display of layered navigation, including price range and product count.
Before you set up basic layered navigation in your Magento, you must make sure your anchor categories and attribute properties that are needed for your layered navigation are configured properly.
Attribute properties, combined with product properties can determine what attributes can be used as a filter for layered navigation. Only attributes with the catalog input type of multiple select, drop-down menu or price can be used as filterable attributes.
There are two basic steps to set up anchored layered navigation system. You need to set up the filterable attributes first, then make sure the category where the attribute is used is an anchor category.
Set Up The Attribute Properties
To set up attribute properties for layered navigation, do the following :
- Go to Catalog -> Attribute -> Manage Attributes.
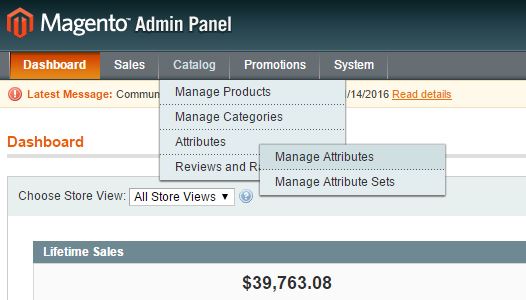
- You can either edit available attributes in the list or make a new one. We will use the most common used attribute : Color. The color is already available on the list, so we will edit it.

- For the “Use In Layered Navigation” option, choose either “Filterable (with results)” or “Filterable (no results)”.
- Set “Yes” for the “Use In Search Results Layered Navigation” option. If you decide to make new attribute instead, make sure to use the same configuration as this one.
- When you finished, click the “Save Attribute” button.
Make The Category as Anchor
To set up category as anchor, do the following :
- Go to Catalog -> Manage Categories.
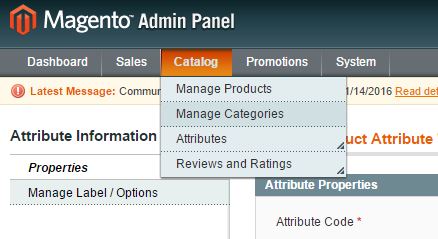
- You can either add a new category as anchor or edit available ones. To edit a category, click on the category to open the configuration menu.
- Go to Display Setting tab and set “Yes” for the “Is Anchor” option.
- When finished, click the “Save Category” button.
- If you want to test the configuration, go to the frontend of your Magento store and select the category from the top navigation on the home page. If you configure it properly, the layered navigation with a filter will appear at the left side of the screen.
Set Up Basic Layered Navigation
In order to set up basic layered navigation for your Magento online store, do the following :
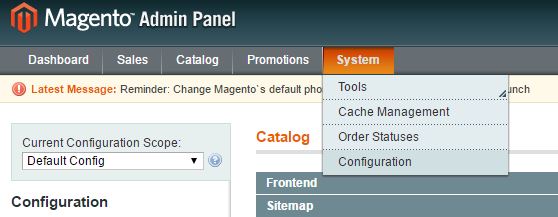
- Go to System -> Configuration.
- In the left panel, choose Catalog under the catalog section.
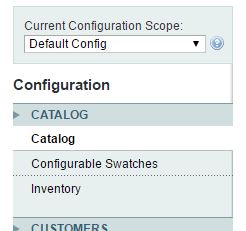
- Click the Layered Navigation section to expand it.
- Set “Yes” for the “Display Product Count” drop-down menu.
- Choose “Automatic (equalize price ranges)” for the “Price Navigation Step Calculation” drop-down menu.
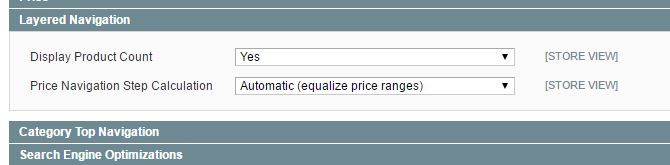
- When you finished, click the “Save Config” button.
Beside attribute, you also can use price to distribute products by price range in the layered navigation system. If you want, you also can split each range into intervals. By default, there are three ways to calculate the price navigation system :
- Automatic (Equalize Price Ranges).
- Automatic (Equalize Product Counts).
- Manual
For the first two, Magento will automatically calculate your price range for layered navigation. On the other hand, the manual method allows you to be able to specify a division limit for price intervals.
Configure Price Layered Navigation
In order to configure price layered navigation, do the following :
- Go to system -> Configuration.
- On the left panel, select Catalog.
- There is the Current Configuration Scope drop-down menu on the upper left side. If you have more than one store views, choose which store view to be configured.
- Click the “Layered Navigation” tab to expand it.
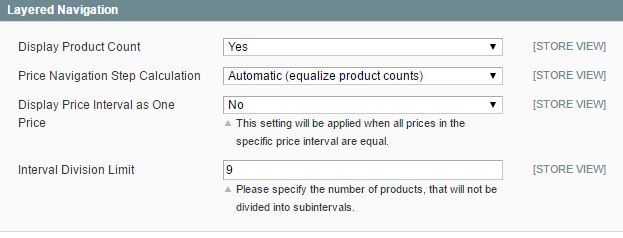
- Set the “Display Product Count” to “Yes” if you want to display the number of products in parentheses after each filtered item.
- There are three available methods to set up the price navigation steps calculations :
- Automatic (equalize price ranges) : This option uses the available price layered navigation algorithm, which is very similar to the automatic option that you can find in the earlier version of Magento.
- Automatic (equalize product counts) : If you choose this option, then additional fields will appear below. You can set “Yes” for the “Display Price Interval as One Price” option if you want to display the single price when multiple products with the same price appear. Enter the threshold for a number of products within a price range in the “Interval Division Limit” field. 9 is the default value.
- Manual : This is the last method. Additional fields will appear below if you choose this option. In the “Default Price Navigation Step” field, enter the value you want. Enter the “Maximum Number of Price Intervals” allowed in the field below. You can enter up to 100.
- When you finished, click the “Save Config” button.